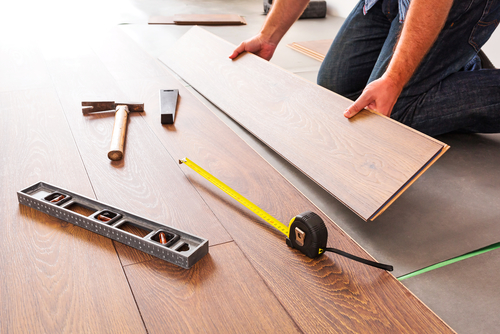
You walk through your home and can picture it: warm wood underfoot from the front door to the back bedroom, one continuous surface that finally makes the house feel finished. Then reality taps you on the shoulder: What is this really going to cost, and how do you budget for it without surprises?
A whole-home hardwood upgrade is a significant investment, but with some planning—and a clear understanding of how materials and installation behave in our dry, high-desert climate—you can build a realistic budget that supports both beauty and performance.
Step 1: Define the Scope Room by Room
Before you ever look at price tags, get crystal clear on what “whole home” means for your layout. Some Cedar City homeowners include every space except bathrooms and laundry; others keep bedrooms softer with carpet and focus wood in main living areas.
Walk the house with a notepad and list each area, its approximate square footage, and what’s on the floor now. Older sheet vinyl, tile, or multiple layers of previous flooring can increase prep costs, so it helps to note where you suspect extra demolition or leveling might be needed. This is also the stage to think about transitions—where hardwood will meet tile or carpet—and how continuous you want the look to be.
If you’re still deciding which species or plank construction makes sense in our bone-dry air, it can be helpful to browse engineered hardwood collections designed for low humidity while you’re mapping out the house. Seeing real products often clarifies which rooms truly need wood and which can stay in another material for budget balance.
Step 2: Understand Material Choices and Climate Impacts
In Southern Utah’s arid environment, solid wood can shrink, crack, and gap if it isn’t carefully selected and installed. That’s why we usually steer whole-home projects toward engineered hardwood, which uses a stable cross-ply core under a real wood veneer. You still get authentic grain and a thick wear layer, but the structure is much better suited to single-digit humidity swings.
The finish you choose also affects long-term costs. High-gloss surfaces show every bit of red dust tracked in from the driveway, while matte or wire-brushed planks camouflage micro-scratches and can stretch the time between deep cleanings or refinishing. Wider planks create a luxury feel but typically cost more per square foot; narrower boards can be a smart way to keep the budget manageable without sacrificing durability.
If you’re pairing hardwood with moisture-prone spaces like kitchens or basements, plan for complementary materials rather than trying to force wood everywhere. Many homeowners like to explore waterproof luxury vinyl options for wet zones and let hardwood handle the main living areas where it will really shine.
Step 3: Factor in Professional Installation and Prep
Material prices are only half of the equation. Subfloor preparation, removal of existing flooring, and professional installation are where a lot of “hidden” costs live, especially in older homes with uneven slabs or patchwork remodel history.
In a whole-home project, you’re not just paying for boards to be nailed or glued down. You’re investing in moisture testing, flatness corrections, underlayment selection, and expansion gap planning that prevent cupping and gapping years down the road. Our installers are trained to read the subfloor like a roadmap, which matters in a climate where even small humidity swings can stress wood fibers.
To understand what’s typically included—from demolition to final trim—you can review how our comprehensive flooring services handle full-home projects. Building these line items into your budget from the start helps you avoid “scope creep” once work begins.
Step 4: Protect Your Investment from Sun and UV
The Mojave sun is relentless. Large south- or west-facing windows in living rooms and kitchens can pump intense UV into the house, bleaching wood tones and cooking finishes long before the floor is worn out structurally. Budgeting for hardwood without budgeting for sun control is like buying a new car and parking it unwashed under a sap-dripping tree.
We strongly recommend planning window treatments as part of your project, not an afterthought. Cellular shades, wood shutters, and layered drapery can cut UV exposure dramatically while still letting you enjoy those big views. When you’re penciling in numbers, leave room for custom window coverings that actively shield your new floors; they extend the life of your finish and reduce how often you’ll need to refinish or replace.
This is also a good time to think about the rest of the room finishes so you don’t overspend on floors only to realize your counters or backsplash now feel dated. Many homeowners like to coordinate surfaces in one pass by reviewing solid-surface countertop options that harmonize with their wood tones, especially in open kitchens that blend into great rooms.
Step 5: Build a Realistic Range, Not a Single Number
Instead of aiming for one “perfect” price, build a high-low range that reflects your choices. For example, your lower bound might assume a mid-range engineered product, minimal subfloor repair, and standard baseboards; the upper bound might allow for a premium species, more intricate patterns, and additional trim details.
As you make design decisions, you can slide within that range without feeling like the project is slipping out of control. If you’d like help tightening that range based on your specific square footage and existing conditions, we’re happy to walk the house with you, talk through tradeoffs, and schedule a technical flooring consultation and estimate that fits both your vision and your budget.